You don't have to be a first-time vaper to be completely stumped by a vape tank. To be frank, vape tanks come in all shapes, sizes, and designs. Some open from the top, some open from the bottom, and some are weirdly unique to their model. None of them are like the cartridges that many vapers get started with.
But when you're working with a refillable tank and it's time for more vape, nothing is more frustrating than not knowing how. Not to mention that doing it wrong could drown your coil or leak all over your hands. In times of stress and puzzle solving, it can help to look at the process in it's most basic state. So here is a step-by-step practical guide on how to refill all but the most exclusive refillable vape tanks.
PRECAUTIONARY STEP: REMOVE THE TANK FROM THE BATTERY.
As a note on safety, always remember to remove the tank from the batter before doing anything else with the device.
PREPARATION: GETTING TO KNOW YOUR VAPE TANK
The first thing you should do is investigate the vaping device to find out more about it. Any vape is easier to refill when you know how it opens and how it is meant to be loaded. Take a close look at the tank and examine the pieces.
DOES YOUR VAPE TANK FILL FROM THE TOP OR BOTTOM?
Top-filling tanks are loaded -- you guessed it -- by taking off a top piece to fill the tank. Often, you can tell a top filler because between the drip-tip and the tank will be a plastic ring layer with an oval opening, that oval is where the tank would like you to fill it. Bottom fill tanks are becoming more common and will need to be flipped upside down to load.
DOES THE TOP OF YOUR VAPE TANK SWIVEL OPEN?
If your vape tank is a top filler, the drip tip piece may be built to swivel open with the flick of a thumb or opening of a latch. this can make it quick and easy to refill on the go once you know what you're doing. Take a quick look to find out if this exists on your vape model. The oval opening should be right below if you succeed.
ARE YOU WORKING WITH A NEW COIL?
Finally, determine if you are working with a new dry coil. If you just vaped a tank, the answer is obviously 'no'. If you are filling a brand new tank or have just installed a new coil, an additional step will be necessary.

STEP 1: OPEN THE TANK
The first step is to get your tank open and prepare to fill it.
OPEN THE REFILL HATCH
If there is a fill latch on top of your vape, between the tank and the drip tip, flip this open now. Use force if there is a button, but do not wrench it too far open. Usually, these swivel a certain distance, then stop.
UNSCREW THE TOP
If there is no access hatch, your vape may be designed to fill with the top removed. Twist off the drip tip top of the vape pen until you find where you can load the tank. Look for the plastic ring with the oval opening.
REMOVE THE BOTTOM
If your vape is a bottom fill rig, then you will need to flip the entire tank head upside down. Then remove both the coil and the bottom of the rig until you can access the open and waiting tank.
STEP 2: POUR OUT OLD E-LIQUID
If there is still e-liquid from a previous tank (especially if it is old), be sure to pour it out before filling up with fresh liquid or in a new flavor. If the remainder is fresh and you want to mix flavors, however, the dump-out is not necessary.
STEP 3: FLAVOR SWITCH-OUT PROCEDURE (OPTIONAL)
If you are switching one flavor for a new flavor and don't want to mix, follow these steps. Replacing coils or cleaning out old e-liquid should do this, too.
CLEAN THE TANK
Start by taking apart the tank into its basic pieces. wipe down the tank and connecting pieces with water and a touch of soap. Then rinse and dry carefully.
INSTALL A NEW COIL/WICK
Do not use an old wick for a new flavor. If you want multiple flavors, consider keeping a wick assigned to each one. When you switch flavors or throw out a tank of old liquid, always switch out the coil/wick as well. This ensures you're always vaping with a coil soaked only in your current flavor.
DRIP THE WICK
Before you continue with the tank filling steps, drip one or two drops of your e-liquid flavor onto the wick to get it damp and suffuse with the liquid. Then put the tank back together and prepare to continue.
STEP 4: TIGHTEN YOUR 'CUP'
Before pouring any e-liquid into the tank, you want to make sure it won't leak through the connections and dribble out onto your hand. So be sure to tighten all connections underneath your tank opening. If yours is a bottom-fill, that means to tighten the top connections currently flipped upside down.
STEP 5: POUR IN NEW E-LIQUID
Now that the tank is clean and tight, get ready to pour.
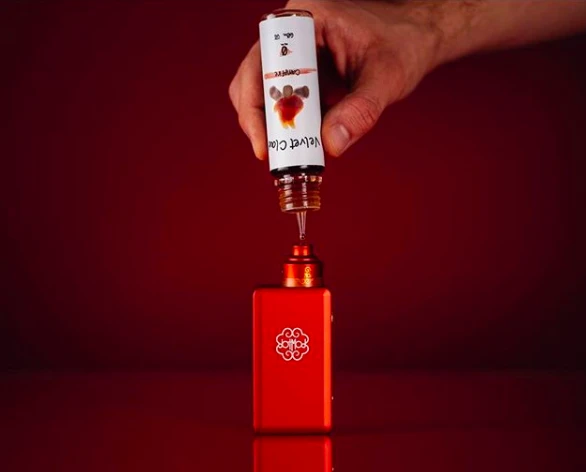
AIM FOR THE GLASS
Point your unicorn bottle tip directly into the tank and aim for the glass. The oval opening in top fill vapes is designed to direct your unicorn tip to the correct place. But even without it, all you have to do is try to get the liquid to flow down the side of the glass.
Be careful not to over-fill your vape. Many tanks have fill lines. If yours doesn't, stop before the tank is 3/4 full.
DON'T HIT THE COIL
Do not point the unicorn tip inward and dribble e-liquid on the coil. This risks drowning the coil which will damage it and reduce the quality of your clouds.
STEP 6: CLOSE UP THE TANK
Finally, close up your tank and make sure everything is ready to go.
RELATCH THE HATCH
If there's a refill latch, close it back up and secure the latch so it doesn't open again when you least expect it.
SCREW ON THE TOP
For all other top fill vapes, simply screw the top piece back on and tighten it carefully to ensure no drips in the future.
REPLACE THE BOTTOM AND COIL
And if you have a bottom fill, reattach the bottom. Put the coil back in, tighten everything, and flip the entire tank back right side up.
STEP 7: VAPE!
Now you are free to vape your freshly filled tank.