It’s been a long and excruciating week at work, mainly because you ran out of vape juice earlier in the week. Luckily, it’s Friday, and your vape mail is at home waiting for you. “TGIF,” you think to yourself as you race home from work breaking every traffic law imaginable. Thankfully, you make it back to your home unscathed and unticked.
Ecstatic to blow clouds of your favorite fruity cereal e-juice, Divine Cereal you quickly fill up your vape tank. You can finally vape, this is the moment that you have been waiting for all week. You close your eyes, fire up your vape, inhale, and nothing happens, so you try again.
Puzzled by the lack of vapor, you observe your screen, and notice the display reads “No Atomizer found.” You belt out a guttural scream, frustration and disappointment mingling.
Your neighbor, who is also an avid vaper, rushes over with an alarmed look on her face. “Everything ok?” she asks, peaking through your door looking around for potential danger. You apologize and let her know you haven’t vaped in a while, but for some reason your atomizer is short. “That’s it?!” she says with a huge grin. “I’ve had this same problem before. It’s an easy fix, don’t worry. Let me see your mod.
After a few minutes of tinkering with your vaporizer, your neighbor resolves the issue. You take a long, satisfying draw from your vape, quickly alleviating all of the stress from the week.
As an appreciation for your neighbor’s help, you share some of your e-liquid and a brewski. You spend the next few hours chucking clouds, and talking about your favorite vape companies and ranking your top 10 comedians of all time.
So, how did your neighbor friend fix your mod?
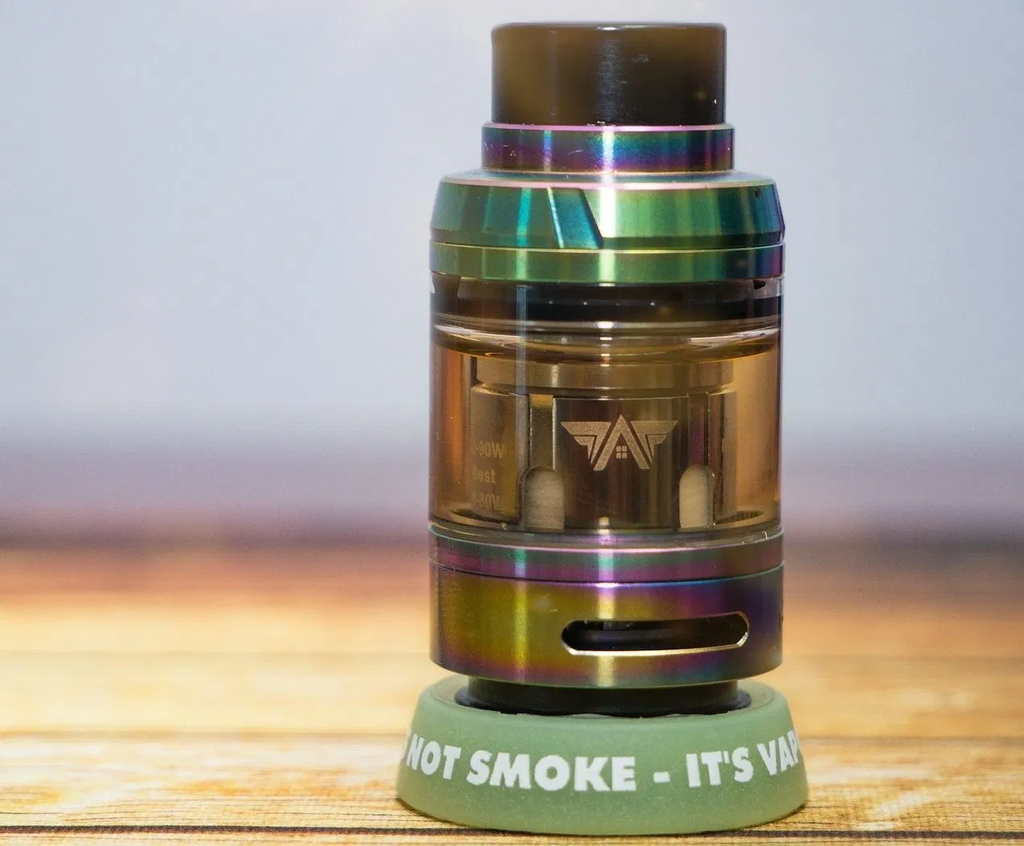
Like any other piece of technology, your vaporizers need routine maintenance. Over time, wear and tear occur, and eventually, you will need to replace some parts. It’s a huge inconvenience when your tank displays the no atomizer message. This issue is especially frustrating for vapers who use their vaporizers multiple times a day.
However, with a little bit of knowledge and patience, you can get to the root cause of a “check atomizer” message and take steps to prevent them from happening in the first place.
Before we dive into the solutions, we need to diagnose the reasons that these things happen. Let’s take a look at the common causes of a check atomizer message.
Why Does My Vape Say Check atomizer?

The check atomizer message is an alert no vaper wants to see, but it can pop up more often than you like. New vapers, you’re not alone, as even people who have been vaping for years can be perplexed at why an atomizer short occurs.
While we all know a check atomizer message may be annoying, usually there is no cause for concern.
The no atomizer message appears when your vape mod is unable to read the resistance level of your coil.
Your mod can display a “no atomizer found” message for a variety of reasons, including:
·The tank is not screwed inadequately. If you don’t fully screw in your tank, the 510 connectors on your mod and tank will not make contact. Whenever which will disable power from flowing through your mod
·Dirty 510 connector – If you don’t maintenance your setup correctly, e-liquid can build up between the 510 connections and cause a “no atomizer found message.”
·Improper installation of a coil into your tank or RDA. If you install your coil and screw it in too loosely or too tightly, the “check atomizer” message can appear
·Defective pin on the tank or mod – The pin on your tank or mod may be faulty due to damage or manufacturing errors
·A short within the electrical components of your mod – Over time, the wiring and electrical components in mods may eventually burn out. This risk increases when you purchase unauthentic vape gear. Shorts can also happen from improper maintenance and during damage from being dropped.
As inconvenient as a “check atomizer” message may be, disabling your mod from firing when the resistance is unknown is an important safety feature. Making sure that your battery is sending the correct amount of electricity to your atomizer is critical to preventing fires and battery explosions.
In the next section, we will list a variety of ways that you can fix the “no atomizer” message.
How to Fix a “Check Atomizer” or “No Atomizer Found” Message
There are several ways to troubleshoot a “check atomizer” message. We will start with the least complicated methods first and move on to more complex solutions.
Preventative Maintenance: How to Clean the Contact Points on Your 510 Threading
Regular maintenance is essential to ensure that your vape functions correctly. E-liquid, dirt, dust, and grime can build up on the 510 connectors on your tank as well as inside of your mod. To clean your 510 connections, follow the steps below:
·Before you clean your tank, wash your hands thoroughly and pick up a pair of rubber gloves
·Turn off you mod or battery and remove your tank by unscrewing the base from your device
·Unscrew the bottom of your tank from the e-liquid well and chimney
·Remove your coil from your atomizer
·Using a q-tip or paper towel, clean the atomizer head inside of your tank out. The section you are looking for is where the coil screws into the base of the head
·After you clean the atomizer head, you need to clean the coil seating. You can do this by wiping down the section of your coil which screws into the atomizer head
·Locate your battery or mod and clean the 510 threading thoroughly
·Take care to make sure that all of the areas that you clean are completely dry
·Reassemble your tank and reattach your atomizer head to your mod or battery
If cleaning your setup doesn’t work, then try our next tip.
Fixing an Atomizer Short by Replacing or Cleaning Your Coil
If cleaning the connections on your vape tank doesn’t work, you may want to look into cleaning your coil.
To clean your coil, disassemble your vape tank.
Disassembly can get a little messy with a full vape tank, so be careful! To keep your vape juice from going to waste, dump it into an empty bottle so that you can use it later.
After you disassemble your tank, remove the coil from the atomizer head. Clean the seating within the atomizer head as well as the area that makes contact with the tank. Double-check the atomizer head to make sure that both connections are completely dry. Reassemble your tank and try using your mod again.
If cleaning your coil doesn’t work, try a different coil.
If your coil is new and you are receiving a, “no atomizer found” message it’s you may have received a faulty coil.
Coils are mass-produced in large batches. So, unfortunately, there is always the rare possibility that you will receive a dud. Keep in mind that if you suspect that your coil is faulty, there is a high likelihood that all the coils in that particular pack may not work. The reasoning behind this is because all of the coils within the same batch are usually faulty.
On the other hand, it may be time to replace your coil if you start noticing burnt hits. If you see the taste of your vape juice is off, then you may have pushed your coil to its limits.
Burnt hits usually occur when your wattage is too high and, or there is too little juice present on your coils.
How to Fix “No Atomizer” Issues on an RDA
If you see a “no atomizer” message while using an RDA or RDTA, the process of fixing your issue is the same as setting a tank.
The only difference is that you will have to re-seat the coil.
To re-seat your coil, loosen the screws on your RDA’s post and reposition your coil to make sure everything is fitting snugly. If re-seating your coil doesn’t fix the problem, try again using more material or a more straightforward build.
In addition to this, leftover pieces of wire may be present in your build deck. If you suspect this is the case, remove your RDA from your mod. Completely disassemble your RDA, and carefully check to see if any foreign material is in between your posts.
Diagnosing a “Low atomizer” Reading: Your Mod is not Compatible with Your Tank.
All too often, new vapers (and even experienced ones) will purchase equipment that is not compatible.
Instead of the infamous check atomizer message sometimes you may receive a similar warning on your screen. The signal that we will be discussing is the low atomizer message. When you receive a low atomizer or low resistance warning, this means that the resistance, or ohm reading, of your tank, is too low for your mod.
For example, say you purchase a tank the goes down to 0.2 ohms. Your mod, on the other hand, can only read a resistance of 0.5 ohms or higher. In this scenario, your battery will be unable to detect your atomizer. To solve this problem, you need to use coils that are 0.5 ohms or above.
How To Fix A Check Atomizer Message by Swapping Parts

If all the tricks above fail to fix your atomizer short, then there may be a problem with your equipment. Either your atomizer or mod may be malfunctioning. You can troubleshoot whether or not you are having hardware problems by using your tank on a different mod, or conversely, by using a separate tank on your mod.
If your mod detects a different tank, then the issue is most likely a faulty coil or atomizer head on your tank.
If your mod isn’t able to read any tank, then one of the following scenarios is the reason. Either the 510 threading on your mod is loose, or the wires connecting it to the battery may have a short. If you’re lucky, your mod has spring-loaded 510 threading that will fit almost all tanks or RDA’s,
Don’t have spring-loaded 510 thread? There are adjustable screws that you can use to re-seat the 510 connection on your mod that may resolve issues with the threading.
Vapor technology has evolved dramatically over the years. Most equipment no longer allows you to adjust the 510 threading manually. If you do have the option to change your coil try removing the batteries from your mod and adjusting it’s 510 threading with a screwdriver.
Takeaways from “Preventing and Fixing Atomizer Shorts”

Atomizer messages are frustrating. However, if you follow our guide, you should easily be able to get to the root cause of why your mod is displaying the “check atomizer” message.
Remember to:
Make sure your tank is adequately screwed in
Make sure all your connections are clean
Check for defective equipment and coils
Utilize the proper resistance level for your the equipment
You wouldn’t believe how many people have purchased new tanks or mods due to this a no atomizer message. A few minutes of troubleshooting could have saved them money and a trip to the vape store.
Now that you have the knowledge to help yourself and others combat the dreaded “no atomizer” message. By utilizing our guide, you can stop guessing what’s going wrong with your setup and find solutions.
While the routine maintenance that we mention in our guide can be applied by almost any vaper, taking apart your mod is another story. We highly suggest that you do not disassemble your mod. Disassembling your mod most often voids the warranty. Plus, any mistakes made by reassembling the product will jeopardize the integrity of your mod. It’s much easier to get a new mod than spend months recovering from injuries caused by attempting to rewire your mod.