Vaping has grown in popularity as a smoke-free option, providing aficionados with a customisable experience. However, store-bought vape devices and e-liquids can be expensive, and some users want to have more control over the materials used. If you want to build your own vape setup, a DIY method allows you to control the e-liquid flavours, coil resistance, and vapour output while saving money in the long run.
Before getting started, it’s critical to understand the basic components of a vaping device. These components include a power supply, a heating element (coil), a wick, a tank or drip system, and e-liquid. Each component contributes significantly to the functionality of your vape. This guide will show you how to build a handmade vape setup using widely available components, resulting in a personalised and delightful vaping experience.
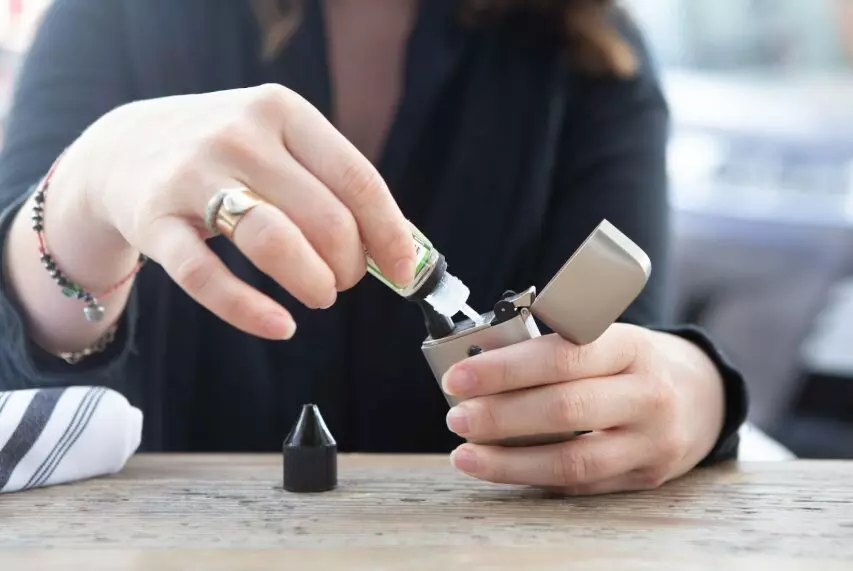
DIY Vape Juice – Making Your Own E-Liquid
One of the most fascinating components of DIY vaping is creating your own vape juice. Commercial e-liquid in NZ may contain additives, and the flavours may not always suit your tastes. By making your own, you have complete control over the ingredients, flavour intensity, and nicotine strength.
Ingredients for DIY Vape Juice:
Vegetable Glycerin: VG is a viscous, mildly sweet liquid that produces vapour.
Propylene Glycol: PG is a thinner liquid that improves throat impact and flavour delivery.
Food-Grade Flavours: A wide range of flavours can be added, including fruits, sweets, and menthol.
Nicotine (optional): Available in various strengths for individuals who desire a nicotine boost.
How To Mix Vape Juice:
Determine the VG/PG ratio based on your preferences—greater VG produces thicker clouds, while higher PG improves flavour.
Process
1.Add 5-15% food-grade flavouring to the whole liquid.
2.Adjust nicotine content as needed to ensure optimal dilution.
3.Mix the ingredients thoroughly, shaking the bottle vigorously.
4.Allowing the e-liquid to steep for a few days will improve the flavour profile.
By experimenting with different flavours and ratios, you may adapt your vaping experience to your preferences.
DIY Vape Coils – Customise Vapour Production

Vape Coils are the key to customising vapour production. Coils are vital in any vaping device since they heat the e-liquid and convert it to vapour. Building your own vape coils provides more control over resistance and performance.
Steps for Building a DIY Vape Coil:
1.Choose an acceptable wire type—Kanthal, stainless steel, or nichrome are popular options.
2.Cut a length of wire and wrap it around a coil jig or screwdriver to create a tight coil.
3.Install the coil onto your atomiser deck and secure the ends properly.
4.Dry-burn the coil at a low power to eliminate impurities and guarantee equal heating.
5.Before using the wicking material, cut the ends and prime it with e-liquid.
Building your own coils improves vapour output and flavour, therefore, it’s a valuable skill for any vaper who wants to build their own device.
DIY Vape Cotton – Wicking Material for Smooth Vaping
Vape cotton has a significant impact on how well your vape works. A good wick promotes continuous e-liquid absorption, preventing dry hits and burnt flavours. Cotton is the best wicking material for smooth vaping.
Choosing the right wick:
Organic cotton: It is the most preferred choice because of its purity and high absorption.
Hemp Fibre: A long-lasting alternative that can withstand high temperatures.
Silica Wicks: They are less prevalent but highly heat-resistant.
To wick your coil, pull a thin piece of cotton through the centre, making sure it fits snugly. Trim and fluff the ends to optimise e-liquid distribution, then saturate with your preferred vape juice before use.
Batteries, Chargers & Accessories

A strong and dependable vape battery is the foundation of a good DIY vaping system. Choosing the correct battery and charger assures peak performance and safety.
Types of Vape Batteries:
1.The most common are 18650 batteries, which provide a good balance of power and size.
2.The 21700 Batteries provide longer battery life and increased output.
3.The 26650 batteries have a higher capacity but are larger.
Battery Safety Tips:
Always use a high-quality charger to avoid overcharging.
When not in use, store batteries in protective cases.
Examine batteries regularly for signs of damage or wear.
Never use multiple battery kinds in the same gadget.
External chargers, battery coverings, and voltage testers can all assist to extend the life of your battery and keep it running safely.
RTA and RDA Vape Products: Custom Atomisers For DIY Enthusiasts

RTAs and RDA vapes are good options for DIY vapers looking for the most customisation possible.
Understanding RTA versus RDA:
RTA (Rebuildable Tank Atomiser): Has a refillable tank, which eliminates the need for frequent drips.
RDA (Rebuildable Dripping Atomiser): Requires manual e-liquid dripping, yet produces excellent flavour and vapour.
Both methods enable users to create their own coils and wicking systems, giving them complete control over their vaping experience.
DIY Tools: Required for Making a Homemade Vape

The appropriate tools are vital for successfully building and maintaining a DIY vape setup.
Must-Have DIY Vape Tools
Coil Jig: Helps form and wrap coils precisely.
Wire Cutters: Used to remove surplus coil wire.
Tweezers: Non-conductive ceramic tweezers enable safe coil modifications.
The OhmMeter: It measures coil resistance to ensure safe operation.
Screwdrivers: Used to secure coils in RDA and RTA decks.
Investing in high-quality tools makes DIY vaping easier, safer, and more efficient.
Final Thoughts
Building your own vape system can be a satisfying and cost-effective method to improve your vaping experience. You may personalise your vape by making your own e-liquid, building unique coils, choosing high-quality wicking materials, and using dependable batteries. Whether you like the ease of use of an RTA or the improved flavour of an RDA, a DIY approach allows for complete customisation.
When experimenting with DIY vaping, always put safety first. Research suitable practices, handle batteries with care, and test your setups before using them. With the correct knowledge and tools, you can construct a high-performance vape setup that rivals commercial devices, all while saving money and having the satisfaction of creating something from scratch.